Bead Loom for Beginners: A Step-by-Step Guide
By the end of this guide you can warp a bead loom, weave a header, lock every row with the two-pass weft method, read a loom chart, and finish the warp ends without your beadwork unraveling.
A bead loom for beginners looks intimidating because of all the threads, but the whole method comes down to two thread systems and one repeated move. Get the warp right, learn the two-pass weft, and you can weave anything a square-grid chart throws at you. This is the canonical loom tutorial we point new beaders to.
Warp, weft, and the words you need first
Loom beadwork is real weaving, so it borrows weaving vocabulary. Three terms do most of the work, and you should know them before you string a single thread.
- Warp: the threads stretched lengthwise on the loom, running away from you. They stay stationary and under tension. Your beads sit in the gaps between them.
- Weft: the working thread carried side to side on a needle. The weft holds the beads and weaves over and under the warp to lock each row.
- Selvedge: the finished outer edge of the piece — here, the two outermost warp threads. A clean selvedge is what makes loomwork look crisp rather than ragged.
Two more terms show up later. The header is a short band of plain thread weaving — no beads — worked at the start and end to stabilize warp spacing. The shed is the gap that opens between raised and lowered warps on looms fitted with a shedding device; simple beginner looms have no shed, and you place beads by hand instead.
Counting warp threads: beads wide plus one
This is the rule that trips up every first-timer: you always warp one more thread than your design is beads wide. A bead has to sit in a gap, and a row of N beads needs N+1 warps to make N gaps. A 15-bead-wide cuff needs 16 warps. A 7-bead band needs 8.
Space the warps to match your bead. A size 11/0 Miyuki Delica is about 1.6 mm across, so your warps want to sit roughly that far apart. Get the count and spacing right and the beads drop into place; get it wrong and every row fights you.
Bead geometry matters on the loom too. A size 11/0 Delica is wider than it is tall — about 1.6 mm wide by 1.3 mm tall, roughly 1.23:1. Render a square image bead-for-bead and it comes out about 20% wider than tall; a circle turns into a horizontal oval. To keep proportions, add rows (multiply your row count by about 1.23) or design the source about 25% taller than wide.
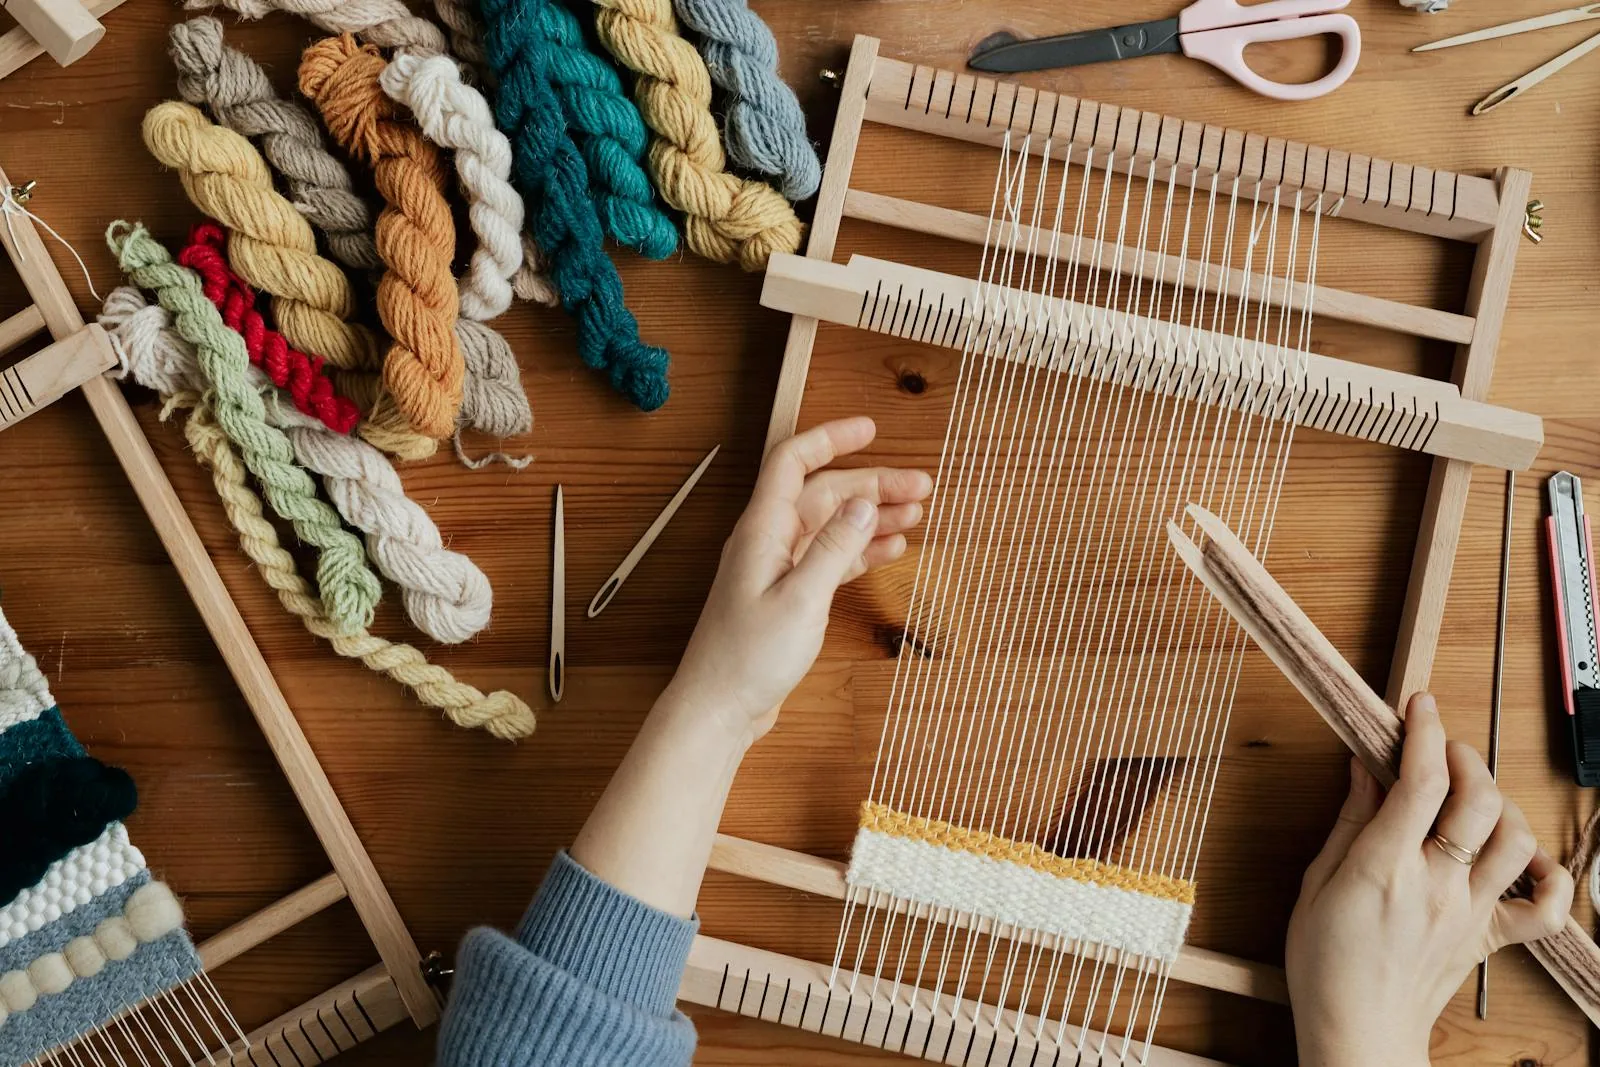
Set even tension across the warps as you wind them on. Too loose and beads sag and shift; too tight and the finished band curls when you cut it off. Even tension is the single most repeated piece of advice from loom teachers, and it is what keeps your beads perfectly aligned column to column.
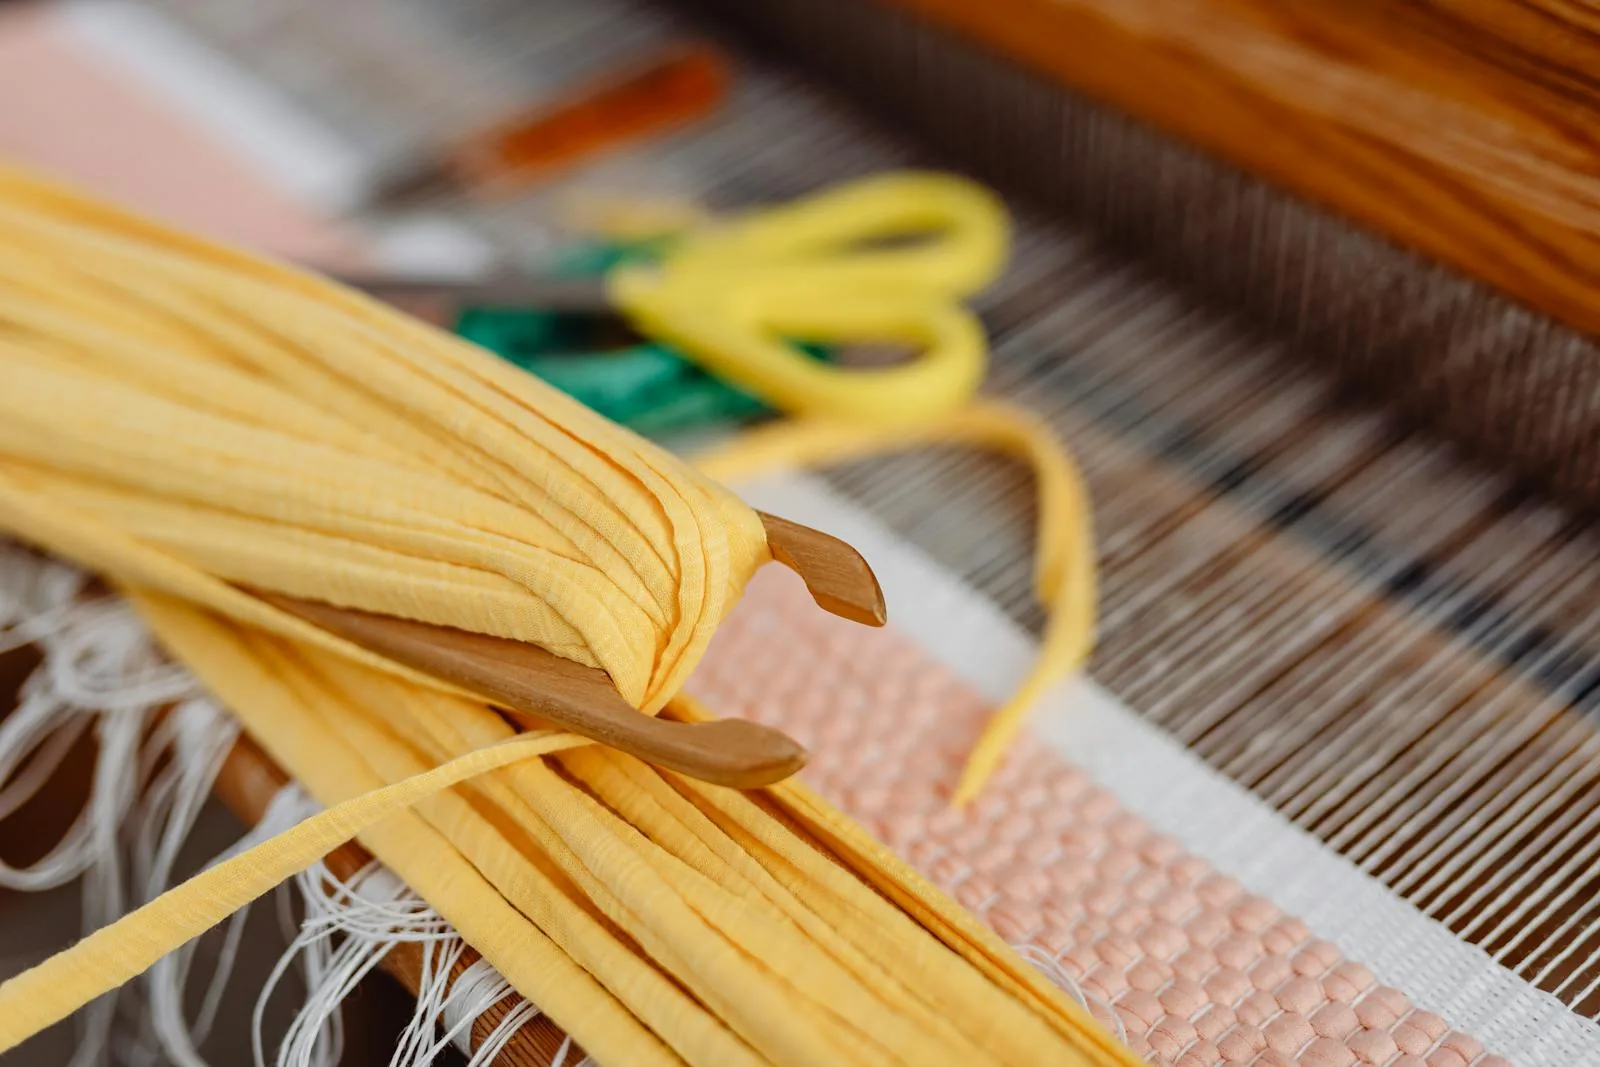
Weave a header to stabilize the warp
Before any beads, anchor your weft thread to an edge warp leaving a long tail, then weave the weft over and under the warps with no beads, back and forth, for about a quarter inch. That band of plain thread weaving is the header.
The header does two jobs. It locks the warp threads at the spacing you set, so they cannot drift while you bead, and it gives you something firm to push the first row of beads against. You will weave a matching header at the end. Skipping the header is the most common reason a beginner's first row slides around.
The two-pass weft: how each row locks
This is the move that defines loomwork, and it is the one step you should not improvise from memory. It is a two-pass technique, and the position of the needle relative to the warp is what locks the beads in.
- String the row. Pick up one bead per gap — that is one fewer than your warp count — in the order your chart calls for, left to right.
- First pass, under the warp. Carry the strung beads under the warp threads. Push them up from below with a fingertip so exactly one bead pops up into each gap between two warps.
- Second pass, on top. Still holding the beads up, pass the needle back through every bead in that same row, but this time keep the needle above the warp threads.
That second pass sandwiches each warp between the two strands of weft — the strand below from pass one, the strand above from pass two. Pull snug and the row is locked. Repeat for every row. Once the rhythm clicks, loomwork is faster than peyote or brick because you place a whole row at a time.
The needle goes under the warp on the way out and over the warp on the way back. Reverse it and the beads will not lock — they spin loose on a single thread. This is the detail beginners most often get backwards.
Reading a loom chart
A loom chart is the friendliest chart in beadwork: a plain square grid where every cell is one bead, columns line up vertically with the warps, and rows line up horizontally with the weft. There is no half-bead offset to track. If you have read a bead chart before, the loom version is the baseline everything else is measured against.
- Columns = warp gaps. A chart 15 cells wide is a 15-bead row, which means 16 warps.
- Rows = weft passes. Read each row left to right, top to bottom, the way you read text.
- Each color block is a bead code — for example DB-0010 (black) or DB-0200 (white) in Miyuki Delica.
Because the grid is square but the beads are wider than tall, a charted circle or text can render slightly squashed vertically in the finished band. Plan for it the way the callout above describes. This square-grid simplicity is the loom's biggest advantage over peyote, where the offset brick layout makes charts harder to follow.
Negative space on the loom: just leave warps unbeaded
"Negative space" is the community term for intentional gaps — cells in the chart with no bead, used for openwork or to shape an edge. On a loom, negative space is trivial: the warp threads run continuously across the whole piece whether or not a bead sits on them, so you simply do not place a bead in that gap and carry the weft straight across. The warp still bridges the void on its own.
That is a real advantage worth understanding. In brick stitch and in peyote, there is no continuous warp to span an internal hole, so a void means working separate strips and bridging them, or stitching a separate motif joined to the body at two or more points — an advanced maneuver. On the loom you just skip the gap. Note that there is no industry-standard symbol for a void in a word chart; Beadify writes it as (N gap), which is our own convention rather than a universal notation.
On the loom, those (N gap) cells need no special handling — the warps already run through them. The same chart in peyote or brick would require you to bridge the opening.
Finishing: the warp ends are the real work
Here is the loom-specific pain point nobody warns beginners about. When the beadwork is done you weave a closing header, cut the piece off the loom, and you are left with a fringe of loose warp ends at both ends — as many as you have warps, which on a wide cuff can be sixteen, twenty, or more threads to deal with.
You do not knot them. You bury each one. Thread a warp end onto a needle and weave it back into the body of the beadwork, following the existing thread path through several beads, with a half-hitch knot tucked between beads along the way, then trim flush. This is the same "weave in the tail / bury the thread" finishing used across bead weaving, just repeated once per warp.
- Weave each warp end in for roughly a quarter inch, threading through beads so the end is hidden and held by friction.
- Or use findings: slide-end tubes, ribbon-crimp ends, or a fabric backing such as Ultrasuede let you trap the whole bundle of warp ends at once instead of weaving each individually.
- Or warp with a no-warp-ends setup — some looms let you anchor the warp so there is nothing to weave in at the end.
For a first project, weave the ends in by hand at least once so you understand the thread path. After that, findings are a reasonable shortcut for wide pieces.

How Beadify helps
Beadify turns a photo into a loom-ready square-grid chart and matches every cell to a real Miyuki Delica, Toho, or Preciosa code, so you order exactly what the chart specifies. It corrects for the wider-than-tall bead proportion and counts your beads per color and per row before you warp the loom. Start from a photo at beadifyapp.com.
Related reading
- Peyote Stitch vs Loom Stitch: Which Should You Choose? — how the two methods change your chart and your finishing.
- How to Read a Bead Chart: A Complete Guide — grid orientation, row direction, and color codes.
- Brick Stitch for Beginners: A Step-by-Step Pattern Guide — the off-loom stitch where negative space gets hard.
Warp one more thread than you are beads wide, weave a header, lock each row with the under-then-over weft, and weave in the ends. Pick a small chart — a 15-bead band a few inches long — and your first loom piece will hold together exactly as designed.
Beadify generates loom-ready charts from your photos, color-matched to real bead catalogs — codes, counts, and proportions handled for you.
Try it free →